HYIP PROGRAM

==================================================== www.topmoneyshare.com

Friday, December 24, 2010

Classic Army M15A4 Carbine Review

Classic Army M15A4 Carbine Review
By: Blackhawk 5


Table of Contents:

Introduction
First Impressions
Real Steel History
Appearance/Feel/Build Quality
Performance
Accessories
Pros & Cons
Conclusion


Introduction:

I got this gun in July 2007, about 6 months before writing this review. I got the gun at Airsoft Atlanta’s walk in store. The gun costs $270+tax. You also must buy a mini style battery, charger, and some BBs. Overall the price should be around $308. Included is the gun, 1 hi-cap magazine, manual, cleaning rod, and front sight adjustment tool.
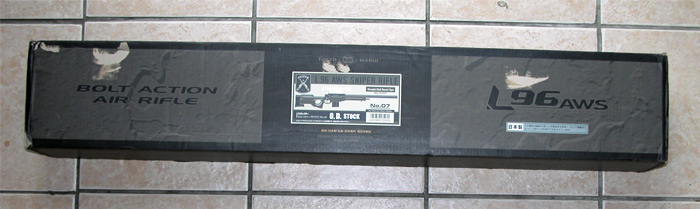
Posted Image
Box it came in

Posted Image
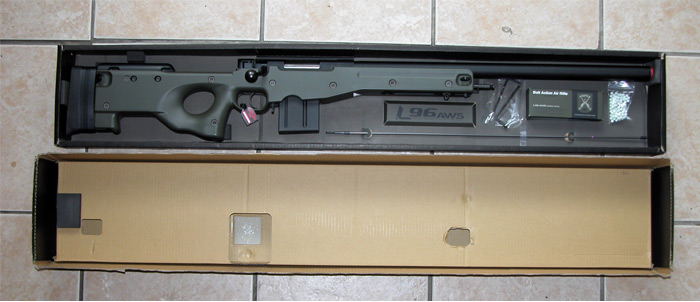
Contents of box: Magazine, cleaning rod, manual, front sight adjustment tool.
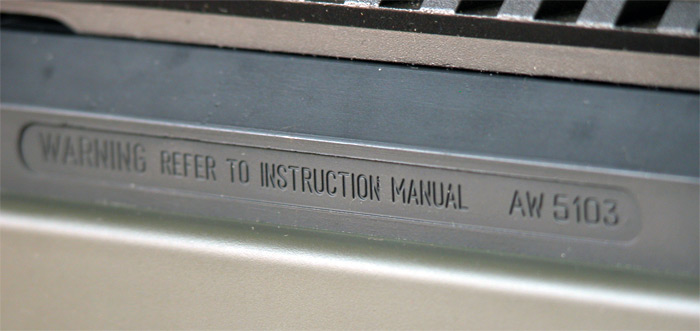
Posted Image
Closeup of manual


First Impressions:
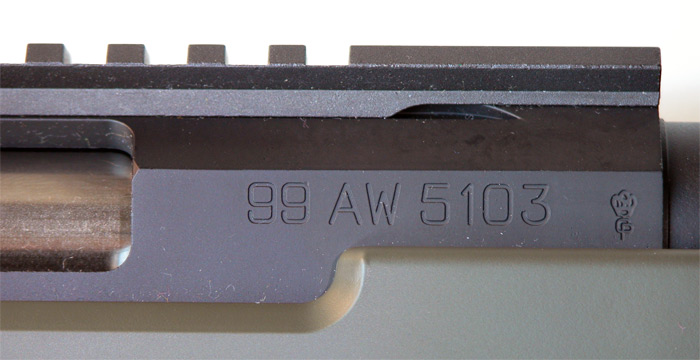
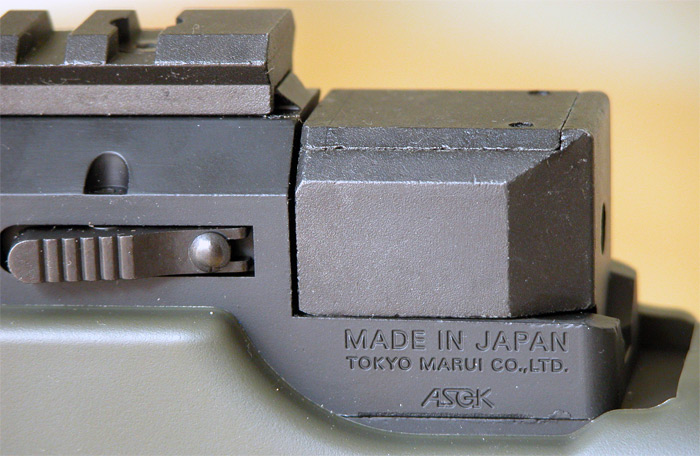
As a previous owner of spring pistols and MPEGs, this was my first AEG. One of the first things I noticed is that its external body is made of metal, making it more durable and a lot harder to break than its plastic counterparts. The gun features firing switches between safety, semi automatic, and full automatic. The Classic Army M15 series guns have also legal licensing from Armalite to have their trademarks displayed on the gun. It also features a unique serial number, meaning each gun made has a different serial number. The trademarks and letterings are not carved in, but does stick on pretty good and does not rub off easily. Even with all the scratches I encountered in deep foliage and bumps, the letters and trademarks stayed intact.
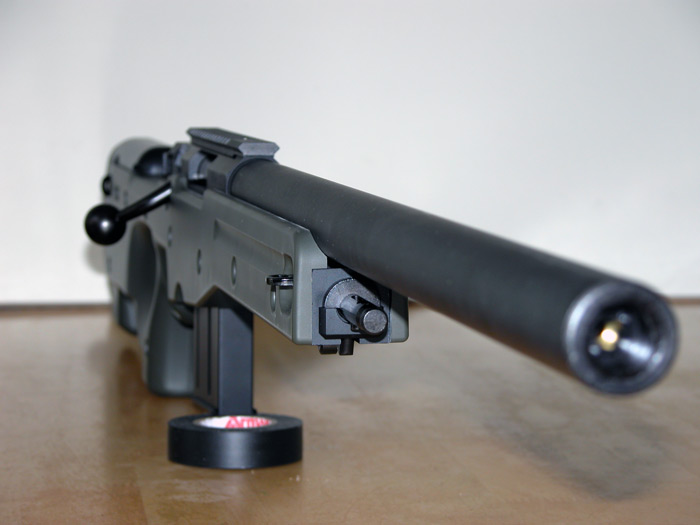
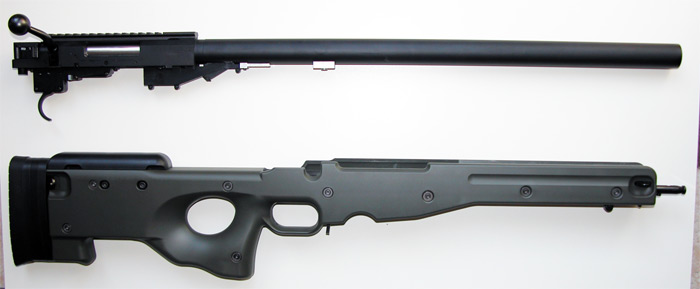
Posted Image
Rifle Side View

Posted Image
Trademarks Left Side

Posted Image
Trademarks Right Side


Real Steel History:
As you know there is no such thing as an “M-15” in real life, this gun is based on the M4a1.

COLT Weapon Systems
http://www.colt.com/mil/M4.asp

Appearance/Build Quality:
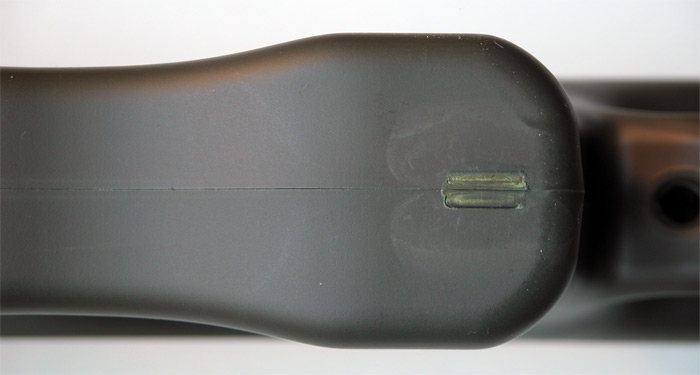
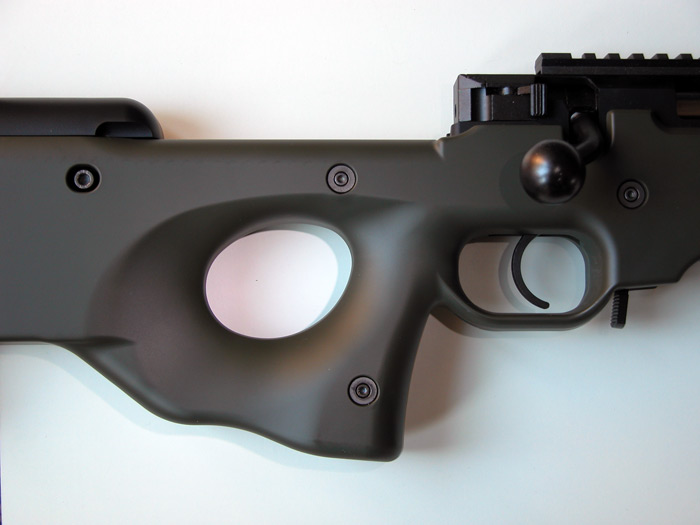
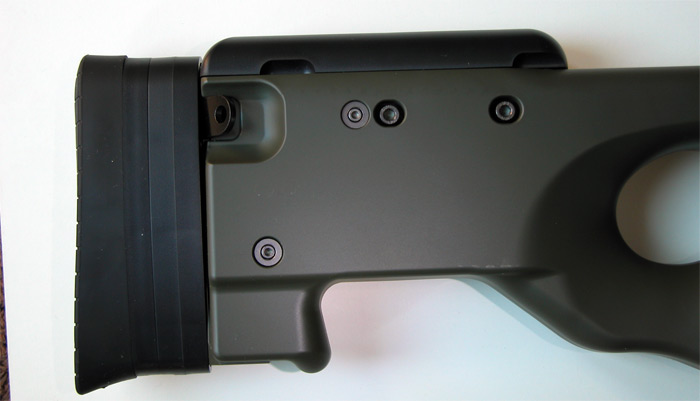
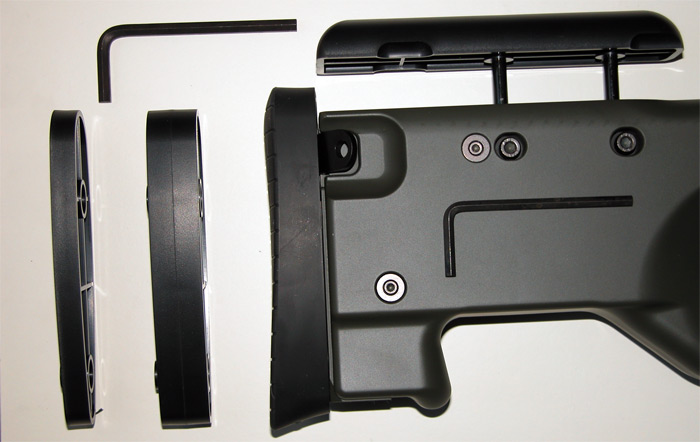
Advertised, this gun is "full metal". The foregrip, hand guards, and the stock are made out of a strong plastic, something not easily bent or broken. It weighs a bit less than 6lbs , making it durable and having a realistic feel to it. The gun itself is very strong, as I from my experiences, I dropped it on the ground several times and it had no effect on the gun. The stock, made of plastic plastic, has 4 positions to adjust depending on the style of the user. This kind of stock replicates its real-steel counterpart, making this gun suitable for close quarter and outdoor environments. The stock has a slight wobble to it. I’ve had a problem with the cap on the end of the stock which the screw was loose, and the piece rattled. It looked like this:
Posted Image
Posted Image
As you can notice, the piece was sticking out. This is an easy fix. In order to do it, take the stock out and use a small hex screwdriver to tighten it. I would suggest inspecting this after you obtain the gun, because my friend lost his in the field.
The charging handle and forward assist have no function and serves no purpose other than decoration. One downside to the build quality is that the front sling mount is a bit wobbly and makes a lot of noise while running around.
Posted Image
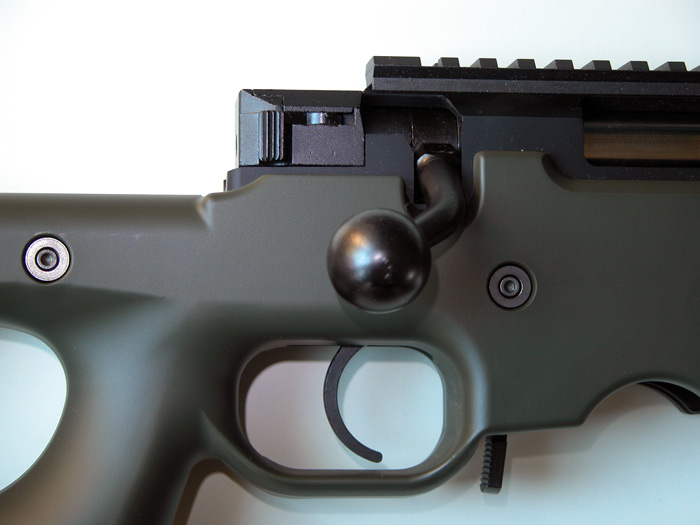
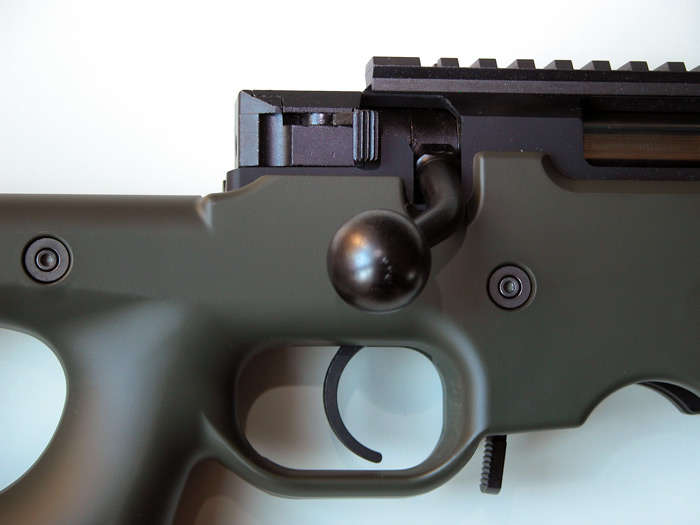
Detail Shot of charging handle area
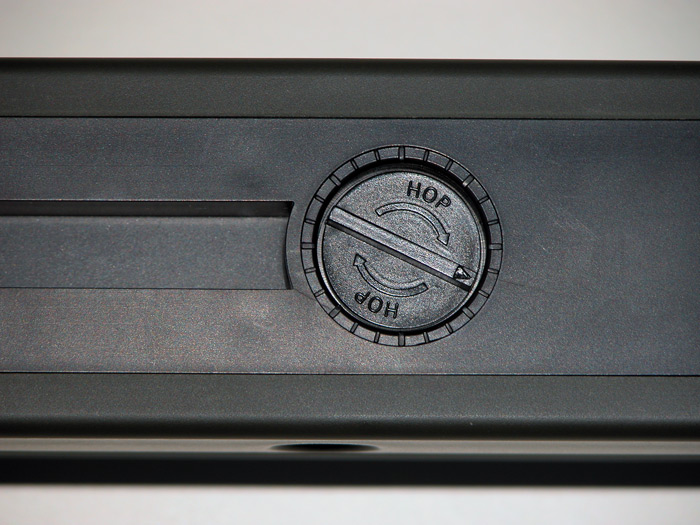
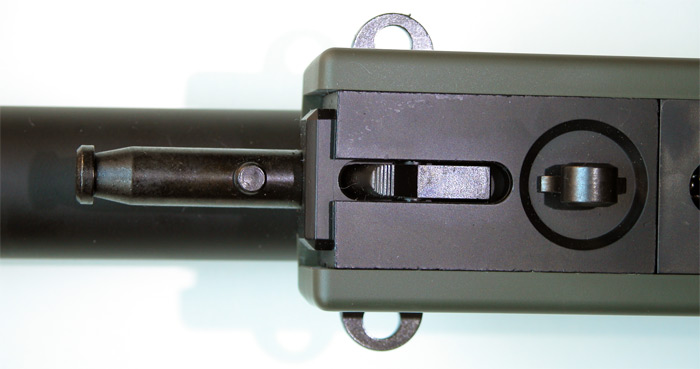
The hop up can be adjusted by opening the dust cover and turning it clockwise to increase hop up and counter-clockwise to decrease hop up. One thing I don’t like is the chamber is covered with a cheap piece of aluminum, which the paint scratches off easily and makes some noise. The dust cover contains magnets on both ends, making it easy to open and close. An advantage of this over other M4s is that the user does not need to pull the charging handle back to adjust the hop up.
Posted Image
Hop up: Clockwise to turn hop up, Counter Clockwise to decrease.

Inserting the battery is a difficult thing for this gun for a first timer, like most M4 variants. The battery is stored in the foregrip. For this, you need to push down the ring and take one of the grips out. A technique I use is by taking out the bottom half of the grip, setting the battery on the top half, and the bottom half with the wires. It takes a lot of strength and practice to get it closed. After a while, it became easier to install the battery. This gun uses a mini type battery. I would reccomend to use an 8.4v or a 9.6v nunchuck battery.
Posted Image
Battery Compartment

Length: 30”, 33” (extended stock)
Height: 9”

Performance:
Collecting data from various retailers, the velocity averages 320 fps, and I chrono'd it at the field with an average of 319 fps. I use this as a main weapon during several games, and it’s done a hell of a job. I had a few bad encounters, first firing the gun in semi auto a couple of times, my fuse went out, so I had to go out and get a new one. I've been told to just remove the fuse altogether by some people, which I did later. The gun does not sound “weak”, or anything like a lower quality gun.
Firetest Report: At 75 feet, 6/10 bbs hit the target, and 50 feet, 9/10 hit the target. This gun has good accuracy, but some factors such as the cold weather and windy day, the results could be better. I am a bit fond of the hop up. Either the setting will be too high or the BB dips down, it's hard to find the right dial. Also you might want to consider tightening the screw on the hop up to avoid it from slipping.

Accessories:
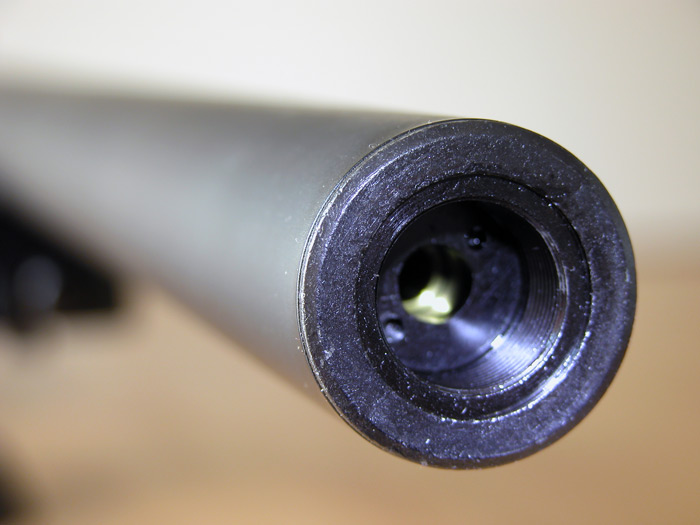
The gun comes with a detachable carrying handle allowing the user to mount accessories. By removing the carrying handle, it has some rail mounts, ideal for mounting scopes. The carrying handle, like other M4/M16 handles features wind and elevation adjustment knobs and 2 lines of view for either closer or longer distances. Personally I don't even consider adjusting the elevation and wind knobs. It also has armalite trademarks on it. The gun also has 2 sling mounts: one on the stock and the other on the barrel to add a sling to it. You will need to buy an adapter for it if you wish to mount a 1pt. sling. The barrel has 14mm counterclockwise threading which makes it able to add a silencer or barrel extension to it. Before this is done, dip the flash hider into near boiling water to break the bonds of the glue. The gun also features a bayonet lug, for those who want to attach a bayonet to the gun. There is another gun by CA similar to this except with additional RIS mounts on the handgrip and PEQ box for $90 more.
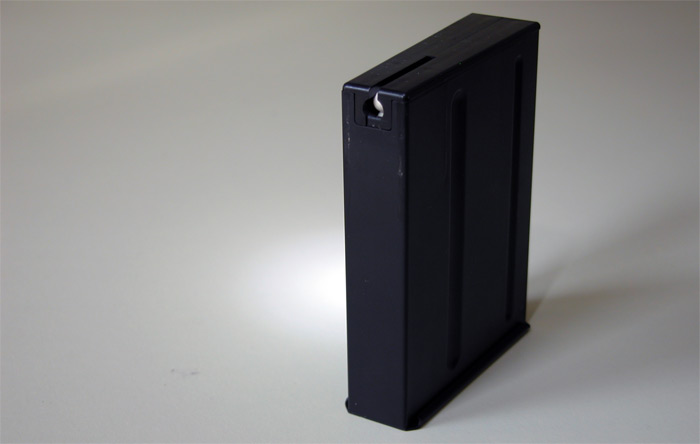
The magazine included is a 300 round hi-cap with a light gray color. I added a homemade mag-pul to it for quick and easy draw (it has since changed from the time I took the picture). I’ve had little to no problems with the Classic Army magazine, feeding flawlessly almost all the time. It is easy to get spare magazines as low as $5 since it is TM compatible. I own 2 M16 magazines, one D-boys and the other an A&K, both TM compatible and fits well in the M15. Later I bought a box of MAG Midcaps which also works with the gun.
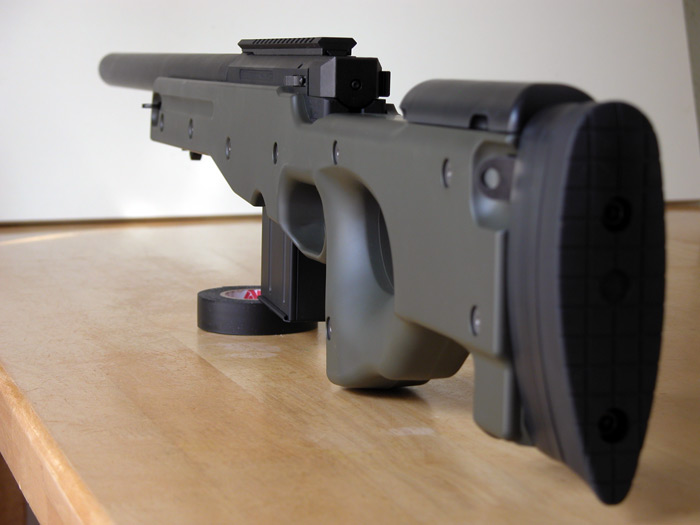
Posted Image
Adjustable Stock

Posted Image
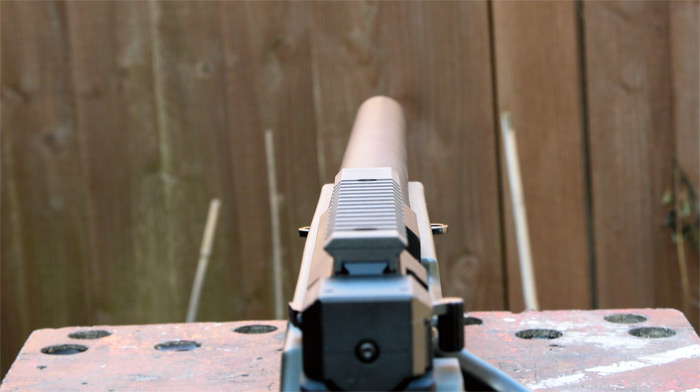
A look down the sights
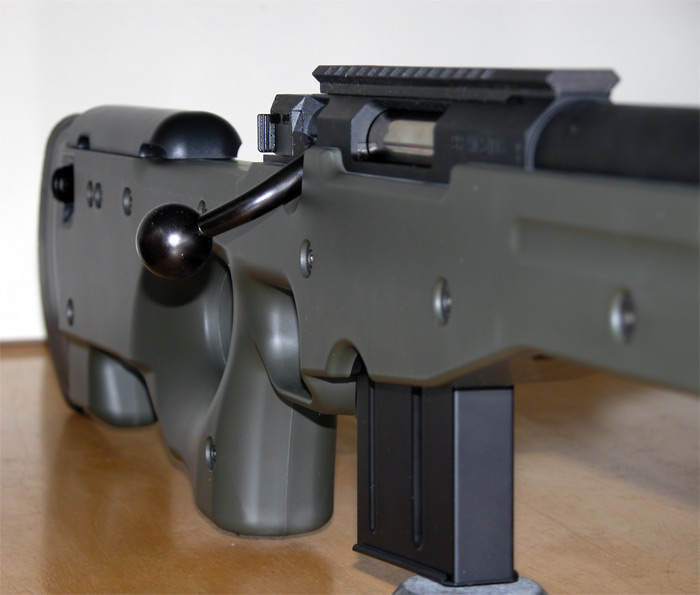
Posted Image
Magazine Chamber

Posted Image
Sling Mount front

Posted Image
Carrying Handle/Iron Sights with armalite logo
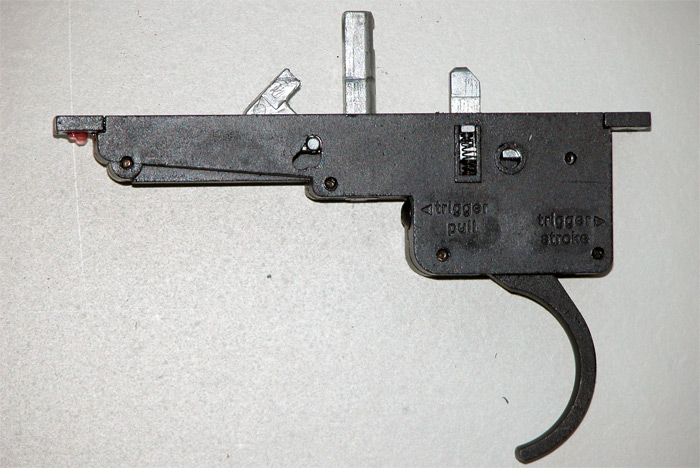
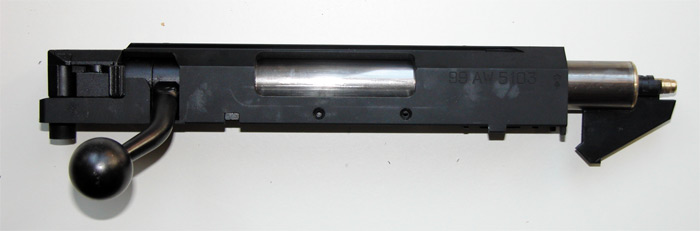
Posted Image
Disassembeled


Pros&Cons:

Pros:
-Full Metal body, solid and durable
-Registered Armalite Trademarks and unique serial number
-Compact design and adjustable stock, adaptable for outdoors and CQB
-Metal Bushings
-Good accuracy
-Adjustable Hop up
-Metal Spring Guide
-TM Compatible
-No barrel wobble

Cons:
-Wobbly Stock/Front sling attachment/Butt Plate
-Paint scratching off some places
-Charging Handle and Forward assist serves no purpose
-Weak fuse (consider removing it and just use a direct connection)
-Hard time installing the battery
-Decent Hop up
-Lack of rails on the handgrip

Conclusion:
Overall, this gun is amazing. I would recommend it to anyone new to airsoft, especially ones who currently own any MPEG or lower quality gun, who are looking for a new gun. Both the internals and externals are reliable. For the batteries, I would recommend an 8.4 or 9.6 volt battery. I still have this gun stock and it is still intact. I’d take this over a TM version of this because of better externals, slightly better performance (in terms of fps) and no barrel wobble at all. The M15 series are one of the best models made by Classic Army, and I highly recommend this gun.

Externals: 9/10
Internals: 7.5/10
Overall: 8.5/10

Saturday, December 18, 2010

VFC AK74U External Customization

Author: Christian "Knuckles" Howarth
The VFC AKU is a quality replica. Straight out of the box it is as nice as anyone could hope for such an esteemed piece. It is shiny black and has a surprisingly durable finish. The two-piece wooden forend is coated in a clear-red gloss that reminds me of the Chi-Com guns from the 1990s that were soaked in cosmoline.

Airsoft Outlet NW provided this replica, and asked me to make it resemble a battlefield veteran. I planned to strip the finish on the wood, bang it up a little, stain it, and rub in an oil finish. On the metalpieces, I simulated wear and weathering using enamel paints. My intent was for this replica to look like it was lovingly carried and used until the day it was dropped in battle and recovered by a lucky operator.

I began by applying two coats of masking tape to the metal trim on the fore and aft of the foregrip. This allowed me to sand away and not worry about damaging the finish of the metal pieces. I used some 150 grit sandpaper and finished with 240. I took off about 85% of the factory finish leaving a tiny ragged border adjacent to the metal ends. This simulates the "baked-in-grease" effect found on well-used examples of the real steel counterparts.

VFC AK74U VFC AK74U VFC AK74U

Following that, I went to work with my trusty church key. Not only does it open tactical barley-pops, it is a handy tool to gouge your wood-bits to make it look like it has held down a barbed-wire fence once or twice, and ridden around in a BMP for awhile. To prepare it for the stain, I used some regular isopropyl rubbing alcohol to make sure that all debris and oils were free from the surface.

VFC AK74U VFC AK74U VFC AK74U

I like Minwax. I've been using the "Special Walnut" color, it provides consistently good results. It lays down a rich deep color and soaks into the fresh marks in the wood, making it look old and weathered. I rubbed in two coats, letting them dry for six hours in between applications. After the second coat had dried (overnight) I took an old white t-shirt and rubbed the forend until all of the stain residue had been removed, leaving a beautiful satin finish. I used some tung oil and rubbed in two coats and let it dry overnight, I used the t-shirt to rub the super-tacky tung oil until it formed a beautiful deep hand-rubbed finish. This finish is durable and beautiful, and it will grow more attractive with use as the patina darkens with age.

VFC AK74UIn between coats of stain, I painted the fake bolt chrome silver. I removed it and cleaned it with alcohol. I used a bamboo skewer to make a handle. The hole in the bolt for the spring return happened to hold the skewer nicely. I sprayed on four very light coats of "Testors Model Master Chrome" and let it dry for at least an hour in between applications. By using the skewer I was able to complete it without ever laying a finger on it and thus eliminated any risk of fingerprints or oils left underneath the paint.

For the magazine I lightly hit the high points with some 600 grit sandpaper. To show it some love, I used watered down white glue and a pinch of real GW1 bring-back sand (thanks Dave wherever you are). This is the moon-dust variety and it laid down in the crevices well and really adds some realism to the overall piece.

VFC AK74U VFC AK74U

Moving onto the metal, I wanted to replicate light wear on all of the raised surfaces. To do so I used a dry-brushing technique. I prefer Model Master enamels as it is some of the best available and wears extremely well. My palette consists of "Chrome," "Steel," and "Aluminum." Mostly I brush an area with one of the colors, and then add a highlight or two with one of the other colors. To dry-brush correctly (it takes practice, trust me) you must load your brush with paint, and then remove 98% of it. Lightly brush the desired areas with the brush. The raised areas will pick up the paint. This is a task which requires patience and concentration. A little goes a long way, so be careful. I like using the chrome-silver and a tiny 5/0 brush to add some fresh dings and highlighted areas. It is almost indiscernible until you get the whole thing in the sun.

VFC AK74UAll said and done I spent roughly nine hours detailing this replica. Most of that time was spent waiting for paint to dry, but I consider it time well spent. This replica looks to me like it was well-used up until the time it was dropped in the sand somewhere on the banks of the Tigris.

** Like My Blog ? Be My Follower ! **


Systema Professional Training Weapon System

M4A1 PTWS AEG Review
Author: Matt "Dantes" Rowell

Systema Professional Training Weapon System

Introduction

Systema set out to create a replica that would revolutionize the AEG as we know it, for the purposes of creating the most reliable and realistic training tool they could. The Systema Professional Training Weapon System (or PTWS) was developed specifically for Law Enforcement or Military training application, but is also available to the private sector.

So, you ask, "Have they done it?" Does it really matter what we think? Really, the PTWS wasn't actually created for mil-sim Airsoft players nor is it marketed to us. Still, here's an objective look on how you might expect it to perform on the playfield.

Before I proceed, I'd like to thank Kumi Yoshida (CEO Systema Engineering), Clyde Caceres (The Development Group International) and Troy Mohr (Tactical Toystore) for making this evaluation possible.

Systema Professional Training Weapon System

How is it Different?

One of the biggest problems with using Airsoft for Law Enforcement or Military training drills is the fact that the AEG continues to fire after the magazine is empty. This wastes battery power, wears down on your gearbox and real steel firearms just plain DON'T do that. Systema set out to solve this flaw by creating an AEG that would be smart enough to know when it's out of rounds and then stop cycling after the last BB is fired. They also wanted to require that the bolt catch be pressed before the AEG could cycle.

In an ideal world, this works as intended. You load the magazine, switch to semi or full auto, press the bolt catch, shoot until your magazine is empty and then repeat. However, Systema doesn't yet have this down to an exact Science. Often times, there's still 2-3 rounds left in the magazine when it stops firing. Also, any time you tap that bolt catch by accident while crawling around in the field will also disable your PTW from firing. Then you might take the magazine out to see if it's time to reload, but no matter what there will always be a BB or two still loaded. It's hard to tell if you ran out of ammo or if you hit that bolt catch censor.

This minor annoyance can be bypassed by holding the bolt catch while you fire. If no BBs come out, it's time to load another magazine. Obviously, this defeats the purpose of having this feature in the first place. Systema's engineers are working to eliminate this problem in future revisions, I'll keep my eyes peeled.

The Interior

Systema's proprietary split gearbox design goes miles beyond what I've seen in the new ICS Olympic Arms branded M4 type replicas. Rather than taking an existing (and by some standards "flawed") version2 gearbox design and simply splitting it in half, Systema opted to have the gearbox inline in the lower receiver. The cylinder set is independent of the gears and completely self-contained. Cylinders can be swapped if you need harder or weaker springs for different occasions or playfields. ($165)

Systema Professional Training Weapon System

They've also introduced circuitry into the lower receiver that ensures every shot fired with the PTWS is a complete cycle. There's no need to ever decompress the spring, it always goes back to the correct position. Skeptics may argue that having even more electronic parts can just lead to more problems, but perhaps they've never had a broken tappet plate before a game. Having been in my hands for a 45 day evaluation, and before that for 90 days with the Army, the circuitry worked flawlessly. You'll notice it as soon as you pull the trigger, the cycle sounds crisp and very smooth, compared to your average Tokyo Marui M4A1 that sounds like a pissed off sewing machine.

Systema Professional Training Weapon System

The barrel and hopup assembly leave much to be desired. I was surprised to hear that all Systema PTWS ship with 6.1mm inner barrels. Notice I did not say 6.01, it's 6.1. Systema manufactures amazing precision inner barrels and I'm not really sure why they didn't use them in this replica. Unfortunately, you also won't be able to swap the barrel because Systema uses a proprietary inner barrel, third party upgrades aren't available. For most training applications, especially indoor, the 6.1 inner barrel will be all you need. However, for those of us Airsofters who are used to getting kills at 100-150 feet outdoors, you will not be impressed by the grouping.

The hopup must be adjusted with an alan-like tool inside the magwell. Each time you have to tweak the hopup, you need to remove the magazine to make another adjustment. Rumor has it, Systema was actually planning to release this model with a fixed hopup. For training, this makes sense, less moving parts mean less operator error. Perhaps they'll kill two birds with one stone and release a precision inner barrel unit with an accurate fixed hopup in future versions of the PTWS. I'll hold my breath.

The Exterior

The PTWS is built to spec as realistic as possible. The body of the replica is much closer to the real steel width of an actual AR15 receiver, due to it's own proprietary in-line gearbox and motor. Of course, the receiver is metal, and all other parts that should be metal are (aside from the flash-hider, more on that below). The first thing you'll notice if you ever handle one is that this thing is a beast! You could chop trees down with it. Having been beaten and battered by the Army for 3 months and then in my hands for 45 days, I had no noticeable barrel wobble at all.

The receiver pins are built with locks so that they cannot be pushed out all the way, for anyone who's lost receiver pins before, I'm sure you understand the importance of a feature like that. The PTWS ships with an orange plastic flash-hider with metal threads for the outer barrel, this is due to the fact that it's marketed as a training tool and not a weapon for mil-sim battles. This is a quick fix with any real-steel flash-hider. On that note, it's obvious that you can take the safety even further by using a blue hand-guard to emphasize the fact that the PTWS is not a real firearm.

Systema's magazines for the PTWS (again proprietary) are very heavy duty and feel much more like the real thing when compared to those made by Tokyo Marui, Classic Army, G&P and so on. They're available in 30, 60, and 120 round versions.

Systema Professional Training Weapon System

The M4A1 model PTWS comes standard with a crane style stock, I had never used one before testing out this replica and now I must say I really miss having it. The stock had multiple locking positions with a rubberized surface where your cheek rests. The stock also serves as a battery compartment, you can fit a 2 prong style large type battery in it for all-day action. After using this battery setup, I would never go back to trying to cram a v-battery into the fore-grip of any M4A1 model. Another thing to note about the battery, make sure you don't plug it in until you're ready to use it. The PTWS' circuitry drains the battery slowly, if you leave it plugged in overnight before a game the next day, you may find it's been drained significantly.

The cocking lever on the PTWS serves no purpose but to assist with removing the cylinder during take-down. It can be used to simulate chambering the first round, however you cannot pull it back nearly as far as with a real steel AR. The forward assist knob also doesn't have any function to the replica itself, but can be pressed. The bolt catch must be depressed in order to prime the PTWS for firing, which is one function of realism that no other AEG has been able to boast.

The finish on the barrel and receiver are very much like you'd expect from a real firearm, it's gray rather than the "painted look" of matte black. Trademarks and serial number are all Systema branded, as to be expected. They're laser engraved and painted white.

Systema Professional Training Weapon System

Durability

The model I was allowed to test had just come off of a 90 day test with the Army, it was not sent in for refurbishment or repair, I received it "as is." It was solid as a rock, no barrel wobble and in great condition.

You also won't have to worry about breaking tabs, the body implements a very solid block of metal where the receiver pin goes through in the back. I can't see any way this would break off under any normal circumstances.

Upgrade Options

All of the internal parts in this replica were built specifically for the PTWS. This means you can't simply swap out a spring or a gear set on your own, as many of us are used to with our standard AEGs. However, Systema makes it easy to upgrade with swappable cylinder sets. A cylinder set is a self contained unit that has everything you need from the spring to the piston itself. Upgrading your AEG from an M100 to an M130 is as easy as opening the receiver and dropping in a different cylinder. 2 minutes tops, and you can do it on the field! Cylinder sets retail at approximately $165, most mil-sim enthusiasts would only ever really need 2 total (one for outdoor, and one for indoor).

For external parts, most real steel parts and AR15 accessories will be compatible with your Systema. This includes things like RIS units, 37mm launchers, flashhiders, stocks, optical mounts, ReadyMag systems and much more. The possibilities here are pretty vast.

Tactically Speaking

The M4A1 is an extremely versatile platform for limited long range use outdoors and amazing for indoor/cqc tactical use. The crane stock also adds a nice touch that you can feel right off the bat when you shoulder it. Keep in mind, everything on the Systema PTWS is specifically for this replica, even the magazines. This means that in a team situation, you will be unable to swap out magazines with your teammates unless they have Systema magazines.

The Bottom Line

I'm not really sure how this platform will bode with Airsoft mil-sim enthusiasts in the United States, considering many of us can go to any gun show next weekend and buy a real-steel AR15 for near the same price. But the fact remains, this is as realistic as an AEG can get. Systema will continue to raise the bar as they release new versions and new replicas. If it's important for you to have an extremely durable and realistic AEG that will actually stop firing when you run out of ammo, the Systema may very well be worth it's $1200 price tag.

For further information about purchasing the Systema PTWS in the US and information about future development, contact Troy Mohr from Tactical Toystore. Troy has been an active player in the Airsoft community here in the Northwest and on Airsoft Pacific for years.

Systema Professional Training Weapon System

Tuesday, December 7, 2010

Tokyo Marui L96 AWS Sniper Rifle

TM L96 AWS Review 01

British firm Accuracy International is the proud manufacturer of L96 Sniper Rifles and its variants. This rifle was initially designated as PM (Precision Marksman) when it was entered into competition in the 1980’s when the British Army was on a hunt for a replacement rifle for their ageing Lee-Enfield derived sniper rifles such as the L42A1.

When the Swedish Military was also seeking a new sniper rifle, Accuracy International entered an upgraded version with AW designation which stands for Arctic Warfare. This version has a special de-icing feature on the barrel making it effective on extreme cold temperatures as low as -40 degrees Celcius. This feature has been adopted in the entire AW range of rifles even if it is not for use on frigid regions. This rifle has been popular among police, civilian and military services all over the world. The British Army decided to adopt this rifle and designated it as L118A1. It is currently being used in Afghanistan and Iraq by the British Army and other coalition forces.

AIRSOFT REPLICA

This review sample was handed-over to me by a fellow operator for review purposes. This did not arrive through a courier unlike those that I would receive direct from the manufacturer such as ICS. As such, the rifle did not come with a Japanese Manual and the strap that secures the rifle to the packaging is missing. The outer part of the box is also a bit tattered.

Nevertheless, the gun is intact and no visible sign of usage or abuse. Just like most sniper rifles on the market, the first thing that will catch your eye is the overall length of the gun as evident on its packaging. Upon opening it, you will find the external manufacturing quality that TM is renowned the world over. Tokyo Marui has endeavoured to replicate the real steel version down to its minute details.

While its real steel sibling would weigh in at around 6.5 kilograms, it is most comfortable to lug around half such weight on a skirmish field for an airsoft variant. After all, we won’t be shooting at targets well beyond 40 Metres on most situations.

THE EXTERNALS

The upper part of the rifle that consists of the receiver and the barrel is made of metal. The external barrel is large at 30 mm diameter. Why? because this model is a suppressed type. The entire length of the barrel acts like a silencer on its real steel version. As with most short and long weapons, your front sight is already useless once you attach a silencer. Hence, an integrated front and rear iron sights are omitted in the design. A 20 mm rail is attached to the receiver for the use of optics which you will definitely need for this rifle. A non-working metal bolt catch is located on the left part of the receiver whilst the bolt handle is also made of metal.

A large metal ball is used at the end of the lever to ensure optimum grip while cocking with the least effort. Bolt travel is smooth and crisp while cocking as well as on its return. The large safety lever ensures that your thumb would easily grasp it even when wearing a thick glove. When the safety is engaged before it has been cocked, the cocking handle could not be moved to its charging position. It just stays there. When it is engaged after it has been cocked, the trigger could not be pulled. Push the safety lever forward to fire and rearwards for safety.

The engraved markings that you will find on the rifle are “99 AW 5103” at the right side of the receiver, “WARNING REFER TO INSTRUCTIONS MANUAL AW 5103” at the left side of the receiver and “MADE IN JAPAN TOKYO MARUI CO. LTD. ASGK” which is located at the left lower end part of the receiver. An initial “A1” is also embossed on the rubber butt plate.

The lower rifle furniture which is made up of one piece hand guard, trigger guard, grip and stock is plastic made. This is matt in texture and is finished in olive drab colour. This is not painted but rather the true colour of the plastic. The quality of the plastic finish seems to be flawless until you come across the lower part of the handgrip as shown on the photo. There is a very obvious moulding imperfection as evident on the picture. This is not an isolated incident for other reviews of this rifle highlighted as well this part. This is not common to a Tokyo Marui product. Nevertheless, most snipers would paint their rifles to their liking so this is not a major issue. Actually, this is just a very minor issue.

Beneath the front guard lies the rotary hop-up adjustment. This type of hop-up is very easy to use. Right after the hop-up to the rear of the rifle is the magazine well. Tokyo Marui went into great lengths in designing the location of this to exactly replicate the real L96. A new BB feeding and hop-up mechanism has been designed for this matter. This is unique to this rifle and is currently the only one in the market for this type of rifle. The provided 40-round metal magazine will feed from the front not from its top and a plastic follower attached directly to the loading nozzle will extract a BB every time the bolt is cocked and on its return travel. This BB will travel through a ramp and into the hop chamber. There are no dropping BB’s when you detach a loaded magazine from the rifle.

When using a bipod, you can adjust the hop-up without taking your eye from the scope or your firing finger from the trigger. The trigger guard is integrated into the one piece plastic body. There is sufficient space for glove wearers to play with their firing finger on the space provided. The visible metal parts that are attached to it are the ambidextrous front and rear sling mounts, magazine release lever, bolt catch and the bi-pod attachment.

A black plastic cheek rest can be adjusted to suit the user’s preference by the allen wrench provided. The plastic butt can also be adjusted by removing, adding or making any combinations of the three parts extension plus the rubber end butt. It feels comfortable to feel a bit of softness on your shoulder from this rubber butt compared to the solid plastic ones by other manufacturers. It also ensures that it doesn’t slide on your BDU and stays rock solid where you want it to be for precise aiming.

THE INTERNALS

There are three Philips screws that you have to remove before the metal receiver and the barrel could be detached from the plastic lower furniture. At first, I thought that the screws would be allen head since there are 3 sizes of allen wrench provided. I was wrong. The first two locations are obvious to the eyes but the third one is hidden beneath the trigger guard. I was surprised that these screws were already loose when I unscrewed them. Just a couple of turns and it popped-out already. This would indicate that this review sample has already been fiddled with.

There are two screws that secure the trigger assembly to the receiver. Upon closer inspection, the red thread lock on the screws appears to have peeled off already. There are adjustments screws for trigger pull and trigger stroke to suit the user. I did not tamper with the adjustments. This rifle utilises a 45 degree sear similar to the VSR but different in some ways. The safety sear cut-out for this rifle is in a different location as that of the VSR. The trigger sear is also longer which means that these parts are not interchangeable with the VSR.

The feeding ramp has to be taken off before the bolt assembly could be removed from the receiver. But before that, the outer barrel has to go first. The RIS on top of the receiver has to be removed for beneath it is a screw that secures the outer barrel to the upper part of the receiver. Two more screws secure the barrel at the lower part. The barrel itself is screwed unto the receiver. You stop screwing it once the holes on the barrel and its mounting holes on the receiver are aligned. I would have preferred a tightened screwing of the barrel to the receiver then securing it with screws for a rigid connection. The present mounting procedure results in a slight play between the barrel and the receiver. This could be remedied by applying a Teflon tape on the thread. Once the barrel has been removed, the loading mechanism that is directly attached to the nozzle has to be removed first before the cylinder can be pulled out of the receiver. The cylinder is pinned shut so I did not venture further into its innards.

Be cautious when removing the inner barrel. After all the screws are undone, there are two tiny springs that secures the two plastic bits at the entrance to the hop-up chamber as shown on the photo. Make sure not to lose this. Gently glide the inner barrel out supporting these tiny springs from flying out of your sight. The inner barrel measured 500 mm long and calliper reading on its inner diameter is 6.05 mm.

PERFORMANCE

Out of the box, I would expect that a bolt action spring rifle would have a minimal deviation in its chrono readings. Here is what I got in FPS: 271, 275, 276, 275, 276, 276, 276, 280, 280 and 281. The readings would indicate that this rifle is based on Japanese standard. I may say that the readings are good enough in terms of consistency. It is the power that I am not happy with. The point in using a sniper rifle is to hit the enemy at a distance where they can’t hit you back with the range of their assault rifles. With this kind of power, it is not feasible. My TM Glock 17 would chrono at 310 FPS on green gas! If you intend to buy one of this, be prepared to splash more cash on third party upgrades from PDI and the likes to achieve a long-range kill factor otherwise this will just be for show. For such power the range was in the vicinity of 30-40 metres after the hop-up has been adjusted.

Here comes a major flaw that prevented me from making a proper and appropriate target test. The outer barrel is not aligned with the receiver. It has a bit of off-set to the right as shown on the photo. I suspect that the mounting is the culprit. Again, the mounting design could be improved to avoid play and misalignment between the barrel and the receiver. It would be frustrating to spend a lot of time zeroing your optics only to be altered if you accidentally knocked your rifle while in the heat of the game.

Its stock weight of around 3 kilograms is not bad for such a huge rifle. This would be much heavier though once you start mounting your long range optics and bipod. The plastic furniture has helped to minimise the overall weight.

Grasping the rifle by the plastic grip is comfortable. The contour of the grip is ambidextrous. The front plastic furniture is a bit boxy but in proper proportion with the large bored suppressed external barrel. Being a suppressed variant of the AW family, I can’t comprehend why TM still decided to adopt a threaded outer barrel. Is it for an additional suppressor? Or they overlooked this one?

CONCLUSION

Tokyo Marui have made the lives of current TM VSR owners miserable. I know that this rifle is better and has a more macho look than the VSR but they can’t have both or the wives will declare war. I like this rifle despite the flaws that I have encountered. But obviously, the internals should be upgraded especially the spring and a tighter inner barrel. Even with the BB swaying to the right due to the misaligned barrel, it still managed to maintain a long level flight after proper hop-up adjustment. The misalignment of the barrel could only be an isolated case and does not reflect the entire production of this rifle.

For those among us airsofters who love the motto “one shot, one kill”, this is your rifle. It won’t break the bank unlike those .50 calibre rifles that seems to be an over kill on most gaming sites. Nevertheless, this is a superb airsoft replica from a current hard-hitting and reliable AI L96 which is currently being used by our guys in the warzones of Afghanistan and Iraq. Tokyo Marui should be commended for replicating down to the minute detail as possible the real L96.

I had my China L96 stolen a couple of years back but this time I will have a TM L96 and no one is going to take it away from me!

SPECIFICATIONS

DESIGNATION: L96 AWS (ARCTIC WARFARE SUPPRESSED) OD (OLIVE DRAB)
TYPE: SINGLE-SHOT BOLT ACTION SNIPER RIFLE
CALIBRE: 6 MM
LENGTH: 1115 MM
WEIGHT: 3280 GMS
INNER BARREL DIAMETRE: 6.05 MM
INNER BARREL LENGTH: 500 MM
OUTER BARREL DIAMETRE: 30 MM
OUTER BARREL LENGTH: 609 MM
MAGAZINE CAPACITY: 40 ROUNDS
PACKAGE CONTENTS: SNIPER RIFLE, MAGAZINE, MANUAL, PACKET OF BBs AND 3 SIZES ALLEN WRENCH

Related Posts Plugin for WordPress, Blogger...
 
Share
ShareSidebar